
This instructable is tied in with building a table and a change of integrity of a hand-held spherical saw to the table. that the table is utilized with totally different instruments – a switch as an example.
The table stands on sawhorses, thus it’s even added a surface than Associate in the Nursing unattached table. The table incorporates a removable board wherever the saw joins. Kindly take care on the off likelihood that you just endeavor this task reception. There square measure power instruments enclosed, that got to inspire extra alert. real table saws cause plenty of wounds, thus envision what may occur with this specially appointed game arrange.
Discover some sanely level wood and create a table. you’ll create legs for it, on the off likelihood that you just want, nonetheless, I simply place mine on sawhorses.
Table Of Contents
Stage 1: create a Removable Panel
Leave a gap within the table. The removable board makes it considerably easier to mount the saw and permits you to utilize the table with totally different devices. To mount a switch, merely create another board and mount the start that.
To introduce aboard, there square measure an excellent deal of decisions. I had washers and small slack screws and was considering however blade I used to be, thus I utilized them. it is a ton of labor to eliminate the slack screws and that I do not have the fitting association for my drill. instead of slack screws, you only North American nation normal screws.
Once more, make sure the totality of your instrumentation is beneath the skin of the table.
In case you are aroused, you’ll even utilize an sq. plane to manage any knocks. However, the plane will simply create it regionally level, thus your table may in any case be off. Yet, the united nations agency cares – on the off likelihood that you just required one thing really precise, you’d have bought a table saw quite a whereas past and you are presumably studying this text to visualize whether or not it is a joke.
Stage 2: create a Flat Edge for the Fence
You may get to add a real piece of wood to the sting, wherever the fence rides, contingent upon the timber you began with and also the last state of the table. I got going while not putting a great deal of thought into the direction of the table, thus I tense with an associate in the nursing unpleasant edge.
I found a level piece of wood of the acceptable thickness, barely 1/4″ compressed wood, and a few pastes. when it had been solidly stuck into place, I understood that the sting was an honest straight board but the perimeters weren’t equal. I had the choice to handle it later in light-weight of the very fact that the fence won’t simply be in step with the sharp edge, not the end of the table.
Stage 3: Mount the Saw to the Panel
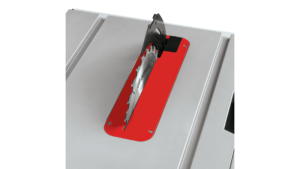
Cut an area within the board and type out how to mount your roundabout saw on the lower part of it. I even have a DeWalt saw (really awful it isn’t Craftsman!) and it’s a fiberglass deck (the dark piece) that I practiced no issue boring through. I utilized 1/4″ instrumentation since that was what I had within reach. I utilized counter-trained openings and carriage jolts, thus I did not get to stress over the jolt turning as I mounting the saw.
There were 2 problems from this discovered, however. within the 1st place, I used to be unable to slice into 2×4 wood in light-weight of the very fact that the sheets I created the table out of were overly thick. to boot, I discovered why zero-leeway plates square measure thus accepted.
I eliminated the most board, that was created out of 3/4″ blunder, and supplanted it with 3/8″ compressed wood. there is a heap of shims to stay it level with the skin of the table. The saw is mounted on a board and there’s the prospect of adjusting the piece that encompasses the sharp edge. The mix of the board and plat works, nonetheless the table is not level. There square measure an excellent deal of very little corners and edges and a few of the time things get captured.
I likewise discovered that the gap was too wide on the grounds that items of wood continued falling into the saw. They either were sent toward the roof of my garage or created the saw delayed down and jam up. thus I created another gap that was sufficiently wide for the saw innovative. It does not have a footing monitor, against payoff convenience or a splitter, thus it’s truly terribly venturesome. I will get to create a splitter and gatekeeper ASAP.
| Also read: Best wet tile saw under $300 |
Stage 4: True the Fence to the Blade
The fence ought to be comparable to the sting. sq. up the fence to the sting. you may presumptively get to pull back the security guard, thus make sure the saw is not connected. At that time place a solitary screw within the T of the fence and sq. it with the end of the table. Add in any event one screw to line the purpose.
I invested with an excellent deal of energy creating the T sq., nonetheless incidentally, the table’s finish wasn’t sq.. I had the choice to handle the excellence utilizing the strategy arranged out on top of.
Stage 5: Cut one thing along with your New Table Saw
After the fence is sq. to the sting, provides it a trial. Set the distance to the fence and also the profundity of the sting.
I required to utilize barely of wire to enact the start the handle of my saw. At that time I utilized the attachment to show it on and off.
Make sure to utilize one thing wood to push your piece through the saw. Check the bearing of the sting before you start cutting.
Likewise, do not wear free clothes or gloves. Do wear security glasses. Have a firm balance before you begin a cut. use caution with snakelike the piece or stopping mid-cut. essentially, think about all the things your look teacher suggested to you.
I likewise created a store truck for my kit and misc instruments. it had been roused (however does not {at all|in the least|the least bit|in the slightest degree|in Associate in Nursing respect} look like) by an instructable regarding building a store table.